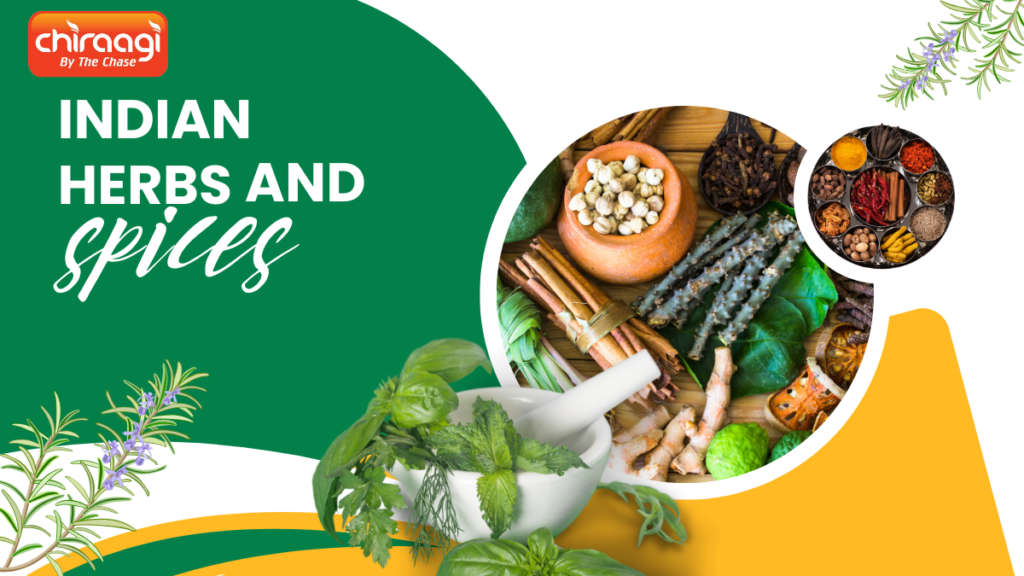
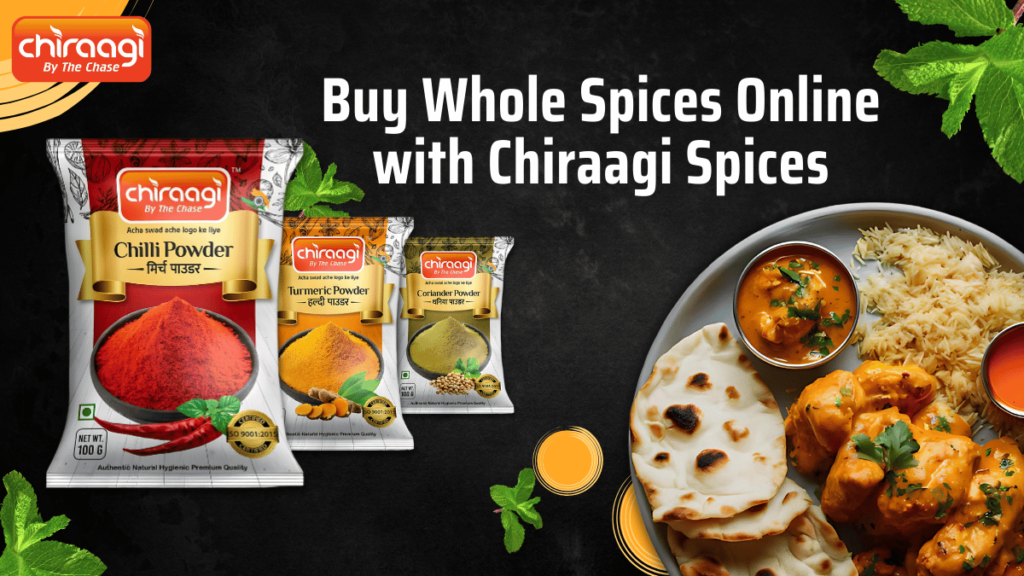
Chiraagi Spices
@chiraagi

Chiraagi spices

Get 10% Off Shop Now

Chiraagi

soft food recipes

Delicious and Nutritious Soft Food Recipes 2024

Maintaining a balance between taste, texture, and nutritional content is crucial when creating soft food recipes. Soft foods are frequently necessary for people recovering from dental work, surgery, or other medical issues. Even though they are simple to chew and swallow, they can yet have a very rich, fulfilling flavor. Here, we offer an extensive selection of dishes with soft food recipes that will please your palate and fuel your body.  Benefits of a soft food recipes For a number of medical disorders and the healing process, a soft food recipes is crucial. These foods are easy to chew, easy on the stomach, and frequently very nutrient-dense.  Here are some benefits: Ease of Digestion: For people who have digestive problems, foods that are soft are particularly crucial as they are easier for their bodies to process.  Nutrient-Rich: Soft food recipes that are cooked correctly can be incredibly high in vitamins and minerals. Versatility: Smoothies, puddings, and soups and stews are just a few examples of the delectable variety of soft meals.  Breakfast Soft Food Recipes Creamy Banana Oatmeal Ingredients: 1 cup rolled oats 2 cups milk or non-dairy milk 1 ripe banana, mashed 1 tablespoon honey 1/2 teaspoon cinnamon Instructions: In a pot, bring the milk to a boil. Add the oats, reduce heat to a simmer. Stir in mashed banana, honey, and cinnamon. Once the oats are soft, cook for 5 to 7 minutes.  Serve warm with a drizzle of honey. Benefits: Because of its high fiber and potassium content, this oatmeal makes a satisfying and healthy breakfast. Soft Scrambled Eggs with Cheese Ingredients: 4 large eggs 1/4 cup milk 1/4 cup of shredded cheese, cheddar or another type you choose  Salt and pepper to taste 1 tablespoon butter Instructions: Mix the eggs, milk, pepper, and salt in a bowl.  Over medium heat, melt butter in a nonstick pan.  Pour in the egg mixture and cook gently, stirring constantly. When eggs are almost set, add cheese and stir until melted. Serve immediately. Benefits: Eggs are a fantastic source of choline, which is essential for brain function, and protein. Cheese is added, adding taste and calcium.  Lunch Soft Food Recipes Creamy Tomato Basil Soup Ingredients: 2 tablespoons olive oil 1 onion, finely chopped 2 garlic cloves, minced 2 cans (28 ounces each) crushed tomatoes 1 cup vegetable broth 1/2 cup heavy cream 1/4 cup fresh basil, chopped Salt and pepper to taste Instructions: In a large pot over medium heat, preheat the olive oil.   Add onion and garlic, sauté until translucent. Add crushed tomatoes and vegetable broth, bring to a boil. Reduce heat and simmer for 20 minutes. Stir in cream and basil, cook for another 5 minutes. Blend the soup until it’s smooth by using an immersion blender. Season with salt and pepper, serve warm. Benefits: Antioxidants abound in tomatoes, especially lycopene, which promotes heart health. Richness is added by the cream, which also helps to thin out the soup. Mashed Potato and Gravy Bowl Ingredients: 4 large potatoes, peeled and cubed 1/4 cup butter 1/2 cup milk Salt and pepper to taste 1 cup gravy (homemade or store-bought) Instructions: Simmer potatoes in salted water for 15 to 20 minutes or until they become soft.  Drain and return potatoes to the pot. Add butter and milk, mash until smooth. Season with salt and pepper. Heat gravy and pour over mashed potatoes. Serve immediately. Benefits: The sauce adds moisture and makes the dish easier to eat, while potatoes are a wonderful source of vitamins C and B6.  Dinner Soft Food Recipes Tender Chicken and Vegetable Stew Ingredients: 2 tablespoons olive oil 1 pound chicken breast, diced 1 onion, finely chopped 2 carrots, sliced 2 celery stalks, sliced 2 potatoes, peeled and diced 4 cups chicken broth 1 cup peas Salt and pepper to taste 1 teaspoon dried thyme Instructions: In a large pot over medium heat, preheat the olive oil.  Add chicken and cook until browned. Saute until softened after adding the onion, carrots, and celery. After adding the potatoes and chicken broth, heat until boiling.  Reduce heat and simmer for 30 minutes. Stir in peas, thyme, salt, and pepper, cook for another 5 minutes. Serve warm. Benefits: This dish is well-balanced and nutrient-dense since it has a lot of protein from the chicken and vitamins from the vegetables.  Baked Salmon with Lemon Butter Sauce Ingredients: 2 salmon fillets 2 tablespoons olive oil Salt and pepper to taste 1/4 cup butter 2 tablespoons lemon juice 1 tablespoon fresh parsley, chopped Instructions: Preheat the oven to 375°F (190°C). Salmon filets should be placed on a baking pan and drizzled with olive oil. Season with salt and pepper. Bake for 15-20 minutes until salmon is cooked through. Melt butter in a small saucepan and mix in the lemon juice.  Pour lemon butter sauce over salmon, sprinkle with parsley. Serve immediately. Benefits: Omega-3 fatty acids, which are critical for heart health, are abundant in salmon. The fish gets moist and soft with the lemon butter sauce, which also adds flavor.  Snacks and Desserts Soft Food Recipes Smooth Banana Yogurt Ingredients: 1 ripe banana 1 cup Greek yogurt 1 tablespoon honey 1/2 teaspoon vanilla extract Instructions: Mash banana in a bowl until smooth. Add honey, vanilla essence, and Greek yogurt and stir. Stir until well combined. Serve chilled. Benefits: This snack is high in probiotics, beneficial to digestive health, and a healthy source of protein and potassium.  Creamy Rice Pudding Ingredients: 1 cup cooked rice 2 cups milk 1/4 cup sugar 1 teaspoon vanilla extract 1/2 teaspoon cinnamon 1/4 cup raisins (optional) Instructions: Combine cooked rice, milk, sugar, and vanilla in a saucepan. Cook over medium heat, stirring frequently, until thickened, about 20 minutes. Stir in cinnamon and raisins, if using. Serve warm or chilled. Benefits: With calcium from the milk and energy-boosting carbohydrates from the rice, rice pudding is a soothing, digestible dessert.  Avocado and Spinach Smoothie Ingredients: 1 ripe avocado 1 cup spinach leaves 1 banana 1 cup almond milk 1

Delicious and Nutritious Soft Food Recipes 2024 Read More »

Daal Ki Pakodi

Daal Ki Pakodi A Delicious Indian Snack

Introduction to Daal Ki Pakodi In Indian cuisine, lentil fritters, or daal ki pakodi, are a delectable and well-liked appetizer. Made from ground lentils, seasoned with a variety of spices, then deep-fried to perfection, these crispy and savory fritters are delicious. All around India, people love them, but especially during the monsoon and on special occasions. In addition to offering variants, nutritional advantages, and serving ideas, this page offers a comprehensive recipe for making this delicious snack. Ingredients for Daal Ki Pakodi These components are required to make daal ki pakodi: Yellow Moong Dal (Split Yellow Lentils): 1 cup Onion: 1 medium-sized, finely chopped Green Chilies: 2-3, finely chopped Ginger: 1-inch piece, grated Garlic: 2-3 cloves, minced Coriander Leaves: A handful, finely chopped Cumin Seeds: 1 teaspoon Asafoetida (Hing): A pinch Baking Soda: A pinch (optional) Salt: To taste Red Chili Powder: 1 teaspoon Turmeric Powder: 1/2 teaspoon Oil: For deep frying Preparation Method 1. Soaking and Grinding the Lentils Begin by properly cleaning the yellow moong dal under running water. Let the lentils soak for two to three hours in adequate water. Legumes should be soaked, drained, and then placed in a blender. Add enough water to grind the lentils into a coarse pulp. When poured into heated oil, the batter needs to be sufficiently thick to maintain its shape. 2. Preparing the Pakodi Batter Chopped onions, green chilies, ginger, garlic, and coriander leaves should all be combined with the ground lentils in a mixing dish. Stir in the asafoetida, cumin seeds, salt, turmeric powder, and baking soda, if using. To create a homogenous batter, thoroughly combine all the ingredients. Although it is optional, adding baking soda aids in creating light and fluffy pakodis. 3. Frying the Pakodis In a deep fryer over medium heat, heat the oil. Pour a tiny amount of batter into the oil to see if it’s ready. The oil is hot enough to fry if it rises to the top right away and sizzles. Drop tiny amounts of the batter—being cautious not to crowd the pan—into the heated oil using a spoon or your fingertips. Cook the pakodis until they get crispy and golden brown, rotating them from time to time to make sure they cook through. When finished, use a slotted spoon to remove the pakodis and drain them on paper towels to get rid of any extra oil. Variations of Daal Ki Pakodi 1. Mixed Lentil Pakodi A variation would be to combine yellow moong dal with a variety of lentils, such as urad dal (black gram), chana dal (Bengal gram), and toor dal (pigeon peas). The pakodis gain a distinct flavor and texture from this mix. 2. Spinach and Fenugreek Pakodi Finely chopped spinach or fenugreek leaves can be added to the batter to improve the flavor and nutritional value of the pakodis. These leafy green vegetables offer extra vitamins and minerals in addition to color. 3. Stuffed Pakodi You may up the ante on this snack by stuffing the pakodis with a spicy paneer or potato filling. Before frying, prepare the stuffing separately and tuck a small amount into the batter. Health Benefits of Daal Ki Pakodi 1. Rich in Protein Due to the high protein content of lentils, daal ki pakodi is a healthy snack choice. The body need protein for muscles to develop, repair, and function as intended. 2. High in Fiber Additionally rich in dietary fiber, lentils support a healthy digestive tract and facilitate better digestion. Foods high in fiber are known to increase satiety, which prolongs feelings of fullness. 3. Packed with Vitamins and Minerals Numerous vitamins and minerals, including iron, folate, and magnesium, are included in daal ki pakodi. Red blood cell generation, energy production, and maintaining strong bones and teeth all depend on these nutrients. 4. Gluten-Free Dal ki pakodi makes a fantastic gluten-free snack for people who have celiac disease or gluten intolerance. It has no wheat or gluten-containing components and is composed completely of lentils.  Serving Suggestions 1. Accompaniments Traditional accompaniments for daal ki pakodi include tomato ketchup, tamarind chutney, and mint chutney. These sauces offer a sour, spicy, or sweet taste that balances the pakodis’ natural flavors. 2. Chaat Style Add chopped tomatoes, onions, coriander leaves, and a drizzle of yogurt and chutneys to your pakodis to turn them into a delicious chaat. Add some chaat masala to the top for a taste explosion. 3. In Curries Additionally, pakodis can be used as a garnish for dal tadka or added to curry recipes like kadhi pakodi. The curry tastes are absorbed by the crispy fritters, adding to the dish’s flavor. Conclusion A tasty and adaptable snack that can be eaten in a variety of ways is daal ki pakodi. It’s a popular among all ages because of its rich flavor and crunchy texture. Curry, chaat, or daal ki pakodi are all excellent ways to present this dish. It will look great any way. To experience the real taste of Indian food, try preparing this tasty snack at home. Also Read:- The Aromatic Splendor of Kahwa Powder

Daal Ki Pakodi A Delicious Indian Snack Read More »

kahwa Powder

The Aromatic Splendor of Kahwa Powder

A combination with roots in Kashmir’s rich cultural heritage, kahwa powder is the ideal fusion of taste and health benefits. This fragrant blend, which is a must for making authentic Kashmiri Kahwa tea, combines cardamom, cinnamon, saffron, and green tea leaves. Kahwa powder is a staple in many homes because of its cooling flavor and well-known warming qualities, especially in the winter.  The Origin and Cultural Significance of Kahwa Powder The Kashmir Valley is where kahwa powder first came to be made years ago, according to historical accounts. Kahwa tea, which denotes warmth and respect, is frequently offered to guests as a token of hospitality. The inclusion of the upscale spice saffron highlights the celebratory and regal quality of this beverage, which is frequently savored on special occasions. Throughout history, kahwa has been more than just a drink; because of its many health advantages, it has been used in Ayurvedic treatments. Key Ingredients in Kahwa Powder Green Tea Leaves Kahwa powder is mostly made from green tea leaves, which have a subtle, grassy flavor that goes well with the strong spices. Part of the health advantages of kahwa are attributed to green tea’s antioxidant content. Saffron The delicate flavor of saffron adds a distinct touch to kahwa along with a beautiful, golden color. Saffron, which is well-known for its antioxidant qualities, improves the tea’s general health profile. Cinnamon In addition to bringing balance to the flavors and reducing inflammation, cinnamon adds a warm, sweet-spicy aroma. Cardamom Cardamom pods add a unique taste and digestive advantages to the blend, along with a pleasant and somewhat lemony scent. Almonds In order to give kahwa powder an extra nutty flavor and an extra boost of vitamins and good fats, crushed almonds are frequently added.  Cloves and Other Spices To improve the flavor profile, add optional spices like nutmeg or star anise, each of which has a distinct flavor and health value. Preparation of Kahwa Powder Selecting Quality Ingredients To create genuine kahwa powder, high-quality components are essential. For the best possible combination, use fresh spices, fine saffron threads, and premium green tea leaves.  Blending the Ingredients Thoroughly measuring and mixing the ingredients is necessary to make kahwa powder. Here’s a basic technique: Mixing Spices: To release the essential oils from the cloves, cinnamon sticks, and cardamom pods, lightly crush them.  Combining with Tea: Add the crushed spices to the green tea leaves and saffron threads.  Incorporating Almonds: For texture and extra taste, add chopped or crushed almonds.  To maintain its freshness and fragrance, store the prepared kahwa powder in an airtight container. Brewing the Perfect Cup of Kahwa Traditional Brewing Method Boiling Water: In a saucepan, begin by gently boiling some water. Adding Kahwa Powder: Pour one teaspoon of kahwa powder into each cup of hot water. Give it a two to three minute simmer. Sweetening:Kahwa is typically sweetened with sugar or honey. To taste, add your favorite sweetener.  Serving: Pour the tea through a strainer into individual cups, and for a traditional finishing touch, sprinkle with saffron or almond strands. Quick Brewing Method Using premade kahwa tea bags or instant kahwa powder blends is a quick brewing solution for people who are pressed for time. Just steep in warm water, then serve after sweetening. Health Benefits of Kahwa Tea Enhances Digestion Kahwa’s spice mixture, especially the cardamom and cinnamon, stimulates the release of digestive enzymes, which helps with digestion.  Boosts Immunity Strongening the immune system and warding against common ailments, kahwa is rich in antioxidants from saffron and green tea. Aids in Detoxification As a natural detoxifier, kahwa tea removes impurities from the body and enhances general health. Improves Skin Health Almonds with saffron’s anti-inflammatory and antioxidant qualities promote healthier, more radiant skin.  Promotes Relaxation Chai is a great drink to unwind with because of its warm, calming qualities, which aid in stress relief and relaxation. Kahwa Variations and Customizations Mint Kahwa The classic kahwa powder blend takes on a refreshing twist when fresh mint leaves are added, amplifying the tea’s cooling effects.  Rose Kahwa Add some dried rose petals for a fragrant and eye-catching twist. Rose petals offer more antioxidants and a subtle floral smell.  Citrus Kahwa For a zesty twist that would make a cool summer beverage, you might add some lemon or orange peel zest to the kahwa powder. Tips for the Perfect Kahwa Freshness Matters For the finest taste and health benefits, use premium, fresh ingredients. Powdered kahwa should be kept dry and sealed away from light and moisture.  Experiment with Ratios To suit your tastes, change the proportion of spices. While some people might like more saffron or cinnamon, others could like a stronger cardamom flavor.  Serving Suggestions To improve the whole experience, pair kahwa tea with traditional Kashmiri breads or pastries. You can also garnish with a stick of cinnamon or a slice of lemon. Conclusion Kahwa powder is a portal to discovering Kashmir’s rich cultural legacy and health advantages; it’s more than just a mix of spices and tea. It is only through comprehending its history, becoming proficient in the making methods, and investigating many modifications that we can truly taste and appreciate this wonderful tea. Chai, whether served traditional or in a contemporary style, is still a tasty and wholesome beverage that soothes the spirit. Also Read:- A Flavorful Indian Delight Homemade Mangori

The Aromatic Splendor of Kahwa Powder Read More »

Mangori Recipe

A Flavorful Indian Delight Homemade Mangori

Made with besan (gram flour) and spices, mangori is a delicious and crunchy Indian snack. Particularly in the northern parts of India, this salty delight is used in many foods to enhance their flavor and texture or just consumed with a cup of tea.  Brief Introduction to Mangori Mangori, sometimes called mangodi, has been a mainstay in traditional Gujarati and Rajasthani cuisines for many years. Due to the scarcity of fresh veggies in these desert places, people came up with the creative idea of drying different items to use them later. In situations when fresh ingredients were unavailable, mangori was developed as a useful and delicious substitute. It gives food a distinctive texture and rich flavor when added to curries and gravies. Mangore is also symbolic of the ingenuity and culinary inventiveness of Indian homemakers since it is often cooked for festivals and other special events.  Commonly Used Ingredients Besan, also known as gram flour, is the main component of mangori and is prepared from ground chickpeas. Besan is combined with red chili powder, cumin seeds, and turmeric to make a thick batter. After shaping the batter into little pieces, it is sun-dried and then cooked till golden crisp. Dried fenugreek leaves or sesame seeds are occasionally used to improve the flavor. Because besan is high in fiber and protein, these components enhance the flavor while also offering nutritional advantages. Traditional vs. Modern Variations The batter must be sun-dried, which can take many days, in order to make mangori traditionally. This process enhances the flavors of the mangori while also preserving it. However, these days, dehydrators and ovens help speed up the drying process. Modern recipes can also use different herbs and spices to provide distinct flavor profiles; some even try baking or air-frying the Mangore for a healthier take. These versions show how this beloved snack has evolved over time, accommodating changing preferences and lifestyles even while the basic components stay the same. Why Make Mangori at Home? Freshness and Quality Control You may be sure to use the freshest ingredients and uphold excellent standards when you make mangori at home. You can choose the best spices and besan, staying clear of any additions or preservatives that might be in store-bought varieties. You can ensure that every piece is made to perfection by keeping an eye on the entire process at home, from mixing the batter to frying the mangori.  Customization of Flavors and Ingredients Tailoring mangori to your preferences is one of the biggest benefits of preparing it at home. To make a special version that appeals to your palate, you can experiment with flavors, add your favorite herbs and spices, and change the degree of spice. To give your Mangore a unique twist, you could, for instance, add a dash of sesame seeds or a hint of garlic. Because of its adaptability, homemade mangori is a customizable and adaptable snack. Cost-Effectiveness and Health Benefits Mangori is relatively inexpensive to make at home. The components are cheap and easily accessible, and the preparation method is simple and needs little equipment. Furthermore, homemade mangori may be healthier than those that are produced professionally. You can have a tasty snack without sacrificing your health if you limit the amount of oil you use to fry and choose healthier alternatives like baking or air-frying. Mangori is not only delicious but also nutrient-dense due to its primary ingredient, besan, which is an excellent source of both protein and dietary fiber.   Ingredients for Homemade Mangori Key Ingredients Besan (Gram Flour) Chickpea flour is used to make besan, the main ingredient. It provides a rich, nutty flavor and a silky texture as the foundation of the mangori batter. Spices Turmeric: Imparts a bright yellow hue and a flavorful, earthy warmth to the mango.  Red Chili Powder: Adds a kick of spice that you can modify to suit your palate. Cumin Seeds: Enhances the other spices with a light, fragrant flavor. Oil for Frying For mangori to be crispy without dominating the tastes, it is best to cook them in a neutral oil such as vegetable or canola.  Optional Ingredients for Variations Dried Fenugreek Leaves (Kasuri Methi): Adds an aromatic flavor that is somewhat bitter. Sesame Seeds: Gives off a little crunchy and nutty flavor.  Other Herbs and Spices: Try experimenting with various ingredients for more taste variations, such as chopped green chilies, coriander seeds, or even garlic powder.  Tools and Equipment Needed Mixing Bowls Crucial to the formation of a smooth, uniform batter by blending and mixing the elements.  Spoons and Spatulas Practical for mixing the batter and making sure everything is thoroughly mixed in.  Frying Pan or Deep Fryer Cooking the mangori pieces until they are golden crisp requires a deep fryer or a deep frying pan. Strainer or Paper Towels for Draining Place the Mangore on paper towels or a colander after frying to remove extra oil, keeping them crispy and low in oil. Preparation Steps for Homemade Mangori Preparing the Besan Mixture Sifting and Mixing Dry Ingredients First, transfer the besan (gram flour) into a big mixing basin by sieving it. In addition to ensuring a smooth batter, this helps to eliminate any lumps. Stir in the cumin seeds, red chili powder, and turmeric to make the besan. Incorporate any alternative components, such as sesame seeds or dried fenugreek leaves, right away. Blend the dry ingredients well to guarantee that the spices are distributed evenly. Adding Water to Form a Thick Batter Stirring constantly, gradually add water to the dry mixture. Water should be added gradually to prevent the batter from becoming overly liquid. Mixing continuously will produce a thick, smooth batter. When shaped into pieces, the consistency should be sufficiently thick without being overly rigid. Ensuring a Smooth and Lump-Free Consistency Work quickly to break up any leftover lumps in the mixture with a spatula or whisk. The batter ought to be uniformly smooth. To assist get the proper texture, let the batter sit for a few minutes so

A Flavorful Indian Delight Homemade Mangori Read More »

Longi Mirch

Exploring Longi Mirch: The Fiery Spice with a Rich Heritage

Longi Mirch, sometimes called Indian Long Pepper or Pippali, is a spice that is used extensively in Ayurvedic and traditional Indian cooking. For generations, people have utilized this unusual spice, which has a strong flavor and distinctive look, to improve food quality and overall well-being. Its strong spicy flavor and elongated, cylindrical shape set longi chilli apart from the more popular black pepper.  Historical Significance and Origin Longi Mirch  Ancient Trade and Usage The longi mirch has a long history, having been a highly valued commodity in the spice trade in antiquity. The Atharva Veda and Charaka Samhita are two ancient scriptures that reference it. It was frequently utilized in Indian, Roman, and Greek cuisines. Ancient doctors were well aware of its medicinal qualities and used it in a variety of formulations for varied therapeutic effects. Cultural Importance The health benefits of longi chilli are highly valued in Ayurveda. Known for its potent rejuvenating properties, it is included in many Ayurvedic remedies to boost energy and facilitate better digestion. Spices have a long history in traditional medicine and food, which is highlighted by their cultural and historical relevance. Culinary Uses of Longi Mirch Flavor Profile The unique taste of longi chilli combines the spiciness of black pepper with a hint of sweetness and earthiness. Because of its stronger heat than black pepper, it’s a favorite spice for people who want to add a burst of spice to their food. Traditional Recipes Longi mirch is used in many different recipes in Indian cooking. Panch Phoron, a five-spice blend from Bengal, and Garam Masala, a widely used spice blend in India, both contain this essential component. Longi pepper also adds a rich, deep flavor to meat dishes, stews, and pickles, enhancing the overall flavor. Modern Applications Beyond its customary applications, longi chilli is becoming more and more popular in modern cuisine. Chefs all around the world are adding it to marinades, sauces, and even desserts to give them a special touch. It adds excitement to any culinary repertoire because of its adaptability. Health Benefits of Longi Mirch Digestive Health The improvement of digestion is one of longi mirch’s most well-known advantages. It enhances food absorption and digestion by encouraging the release of digestive enzymes. longi chilli is frequently used to relieve bloating, constipation, and dyspepsia. Anti-Inflammatory and Antioxidant Properties Compounds in longi chilli have potent antioxidant and anti-inflammatory qualities. These substances support the body’s defenses against oxidative stress, which is connected to long-term illnesses like cancer and heart disease, as well as inflammation reduction. Respiratory Health Longi mirch is used to treat respiratory ailments like bronchitis, asthma, and cough in Ayurvedic medicine. Its expectorant qualities aid in mucus clearance and enhanced lung function, relieving respiratory conditions.  Weight Management Excess weight can be managed and metabolism boosted by longi chilli. The spice is beneficial for weight management due to its thermogenic qualities, which enhance the body’s ability to burn calories. Cultivation and Harvesting of Longi Mirch Growing Conditions Tropical and subtropical regions are ideal for longi mirch growth. It grows best in a warm, humid atmosphere with well-drained soil. India, Sri Lanka, and other Southeast Asian countries are the usual growing locations for this plant.  Harvesting Process longi chilli must be harvested carefully to preserve the spice’s strength. When completely grown but still green, the pepper spikes are collected. After that, they are sun-dried until they take on a dark brown or black hue, which indicates they are ready for use. Processing and Storage Longi pepper is frequently used whole or powdered after drying. To preserve its flavor and power, storing must be done properly. It is recommended to store the spice in an airtight container, shielded from moisture, heat, and light.  Incorporating Longi Mirch into Your Diet Cooking Tips Balancing Flavors: Longi mirch is quite hot, so use it with caution. It blends well with other spices like fennel, coriander, and cumin to create a pleasing combination of flavors. Enhancing Dishes: To improve the flavor of soups, stews, and curries, add longi mirch. It can also be used to add a strong spicy flavor to meat and vegetable marinades. Experimenting with Recipes: Try using longi chilli in new recipes without fear. For a pleasant and unexpected twist, try sprinkling some into fruit compotes or truffles. Health Supplements For people who want to take advantage of longi mirch’s health benefits without changing their diet, it can be found as a supplement. Usually, the goals of using these supplements are to assist healthy digestion, boost metabolism, and facilitate breathing.  Conclusion A spice with a long history and many health advantages is longi mirch. Because of its distinct taste and powerful health benefits, it is a great addition to any kitchen. Longi chilli adds a unique flavor and a plethora of health advantages to dishes, whether they are prepared traditionally or in more contemporary ways. Also Read:- The Complete Guide to Improving Your Culinary Creations: Mastering Mixed Herbs

Exploring Longi Mirch: The Fiery Spice with a Rich Heritage Read More »

Mixed Herbs

The Complete Guide to Improving Your Culinary Creations: Mastering Mixed Herbs

Because they add a symphony of tastes to a wide range of recipes, mixed herbs are an essential part of every gourmet kitchen. They are a flexible mixture of different dry herbs, each adding a distinct flavor and perfume to the mixture. The composition, applications, advantages, and methods for creating your own blend at home will all be covered in this article’s exploration of the world of mixed herbs. A thorough understanding of mixed herbs will improve any home cook or seasoned chef’s dishes to unprecedented levels. What Are Mixed Herbs? Several dry herbs are usually combined and blended to create a powerful and well-balanced flavor profile known as mixed herbs. These mixes, which are widely utilized in European cooking, are a mainstay in many kitchens worldwide.  The exact composition can vary, but the most popular herbs included are: Basil Oregano Thyme Marjoram Rosemary Sage These herbs are carefully chosen to create a harmonic blend that enhances the flavor of many different foods because of their complementary qualities. The Composition of Mixed Herbs Basil It is well known that basil has a sweet, spicy flavor with undertones of clove and mint. It is a popular herb in Italian cooking, frequently seen in pizza, salads, and pasta sauces. Due to its fragrant qualities, basil is a useful addition to any mixture of herbs. Oregano The flavor of oregano is strong, earthy, and slightly bitter. It is an essential component in Mediterranean cuisine, especially Italian and Greek cuisine. Garlic complements meats and vegetables as well as tomato-based sauces.  Thyme Thyme adds a faintly minty flavor with hints of earthiness and floweriness. It goes well with a wide range of foods, including roasts, veggies, and soups and stews. Thyme’s culinary use gains a healthy twist due to its antibacterial characteristics. Marjoram Marjoram has a sweet, moderate flavor with hints of citrus and pine. It’s a common seasoning for meats, sausages, and veggies. Because of its mild flavor, marjoram is an excellent herb for balancing mixtures. Rosemary Strong piney flavors with undertones of lemon and mint characterize rosemary. It is a typical seasoning for lamb, chicken, and roasted vegetables in Mediterranean cooking. The strong scent of rosemary gives mixed herb mixtures complexity. Sage Fresh lemon and eucalyptus notes complement the warm, somewhat spicy flavor of sage. It is frequently combined with fatty meats, stuffing, and sausages. The strong flavor of sage gives a distinctive touch to the combination and balances off the other herbs. Uses of Mixed Herbs You can utilize mixed herbs in so many different culinary applications since they are so versatile: Seasoning You can season meats, poultry, fish, and vegetables with a mixture of herbs. Their addition of flavor increases the inherent flavor of the ingredients. For a burst of flavor, sprinkle a mixture of herbs on top of roasts or grilled foods. Soups and Stews Soups and stews are elevated with a varied flavor character that comes from adding mixed herbs. The herbs combine nicely with the other components to provide a filling and delicious supper. Sauces and Dressings Blended herbs are ideal for bringing out the taste of salads and sauces. They add a herbaceous note that balances the major flavors of tomato sauces, creamy dressings, and vinaigrettes. Bread and Doughs Mixed herbs give bread and doughs, such as focaccia or pizza dough, an aromatic flavor that improves the finished product. The tastes of the herbs seep into the dough, making for a wonderful meal. Marinades and Rubs Vegetable and meat rubs and marinades benefit greatly from the use of mixed herbs. The components are infused with rich, aromatic flavors by the herbs as they permeate them. Health Benefits of Mixed Herbs In addition to being used in cooking, blended herbs provide several health advantages. Antioxidant Properties Numerous herbs found in mixed mixes, like rosemary and oregano, are high in antioxidants. By lowering the body’s oxidative stress, these substances lower the chance of developing chronic illnesses. Anti-Inflammatory Effects The anti-inflammatory qualities of herbs like thyme and sage can aid in reducing inflammation and enhancing general health. Regular use of these herbs can help support a more robust immune system. Digestive Health Herbs that are mixed, especially basil and marjoram, can help with digestion. They are advantageous for digestive health because they increase the synthesis of digestive enzymes and lessen gastrointestinal pain. Antimicrobial Properties Some herbs that are used in mixed blends, such oregano and thyme, have antibacterial qualities. They can enhance general health and wellbeing by serving as a barrier against bacterial and fungal diseases. How to Make Your Own Mixed Herbs Blend By making your own homemade mixed herb blend, you may personalize the flavors to your taste.  For your reference, here is a basic recipe: Ingredients 2 tablespoons dried basil 2 tablespoons dried oregano 2 tablespoons dried thyme 1 tablespoon dried marjoram 1 tablespoon dried rosemary 1 tablespoon dried sage Instructions Measure the Herbs: As directed by the amounts listed, measure out each dry herb.  Combine the Herbs: Gather all of the dried herbs into a basin. Mix Well: In order to distribute the herbs equally, stir them all together. Store: Place the blended herbs in an airtight receptacle.  Usage Tips Sprinkle over Roasts: Grilled and roast meats can be seasoned with your own handmade mixed herbs. Enhance Sauces: To enhance the taste of your sauces and soups, add a teaspoon of the mixture. Bread Dough: To give bread dough a hint of flavor, mix one spoonful in. Conclusion Because they offer a fusion of flavors that complement a broad range of foods, mixed herbs are a necessary component of any kitchen. Mixed herbs are very easy to use and quite adaptable; they can be used for anything from seasoning meats to making tasty soups and sauces. By being aware of the characteristics and advantages of mixed herbs, you may enhance your cooking by making the most of these flavorful combinations. To taste the entire spectrum of flavors that mixed herbs have to offer, try creating

The Complete Guide to Improving Your Culinary Creations: Mastering Mixed Herbs Read More »

Upma Recipe

Upma Recipe: A Comprehensive Guide to the Perfect Breakfast Delight

A popular South Indian breakfast meal known for its rich, savory flavors and lovely texture, upma has won over lovers all over the world. Primarily composed of semolina (also known as rava or suji), this dish is not only filling but also adaptable, with multiple ways to customize it to suit various tastes. This post delves deeply into the technique of crafting the ideal upma, guaranteeing that each mouthful is a gourmet experience. Ingredients for Upma Recipe To make a delicious and authentic Upma Recipe, you will need the following ingredients: 1 cup semolina (rava/suji) 2 tablespoons ghee or oil 1 teaspoon mustard seeds 1 teaspoon cumin seeds 1-2 green chilies, chopped 1 teaspoon grated ginger 1 medium onion, finely chopped 1 small carrot, finely chopped (optional) 1/4 cup green peas (optional) 1/4 cup finely chopped bell peppers (optional) 8-10 curry leaves 2-3 tablespoons roasted cashews or peanuts (optional) Salt to taste 2.5 cups water 1 tablespoon chopped fresh coriander leaves 1 tablespoon lemon juice Step-by-Step Guide to Making Upma 1. Roasting the Semolina For your upma to have the perfect texture and flavor, roasting the semolina is an essential step.  Here’s how you do it: Heat a pan on medium flame. After adding one cup of semolina, dry roast it while stirring constantly until it takes on a light golden brown color. This should take between five and seven minutes. Stirring frequently will help you avoid scorching. When the semolina is roasted, move it to a platter and reserve.  2. Preparing the Seasoning The flavor of Upma Recipe is derived from the spice.  Follow these steps to prepare it: Upma’s unique flavor comes from the seasoning.  One teaspoon of mustard seeds should be added and allowed to sputter. One teaspoon of cumin seeds should be added and allowed to crackle. Grated ginger, curry leaves, and sliced chili peppers should be added. Sauté for a little period of time, or until the raw scent goes away. Add the onion, finely diced, and sauté it until it becomes transparent. Usually, this takes two to three minutes. Add the diced carrot, green peas, and bell peppers at this point if you’re using vegetables. Cook for 3–4 minutes, or until they are just beginning to soften. Add the roasted cashews or peanuts at this time for an added crunch. 3. Cooking the Semolina Now comes the most important step: cooking the semolina: Once the pan is half full, add 2.5 cups of water and salt. Stir well. The water should be heated to a boil. Add the toasted semolina to the boiling water gradually, stirring frequently to avoid lumps. You must do this to get a really creamy and smooth upma. Lower the heat and continue cooking while stirring the mixture from time to time. thickened by the water absorbed by the semolina. It should take five or six minutes to complete.  4. Adding the Final Touches To add more flavor and a spicy, new element to your upma, do the following: After turning off the heat, squeeze in one tablespoon of lemon juice. Toss to blend well. Add chopped fresh coriander leaves as a garnish. 5. Serving the Upma Recipe You can now enjoy your delectable upma. Pickles, coconut chutney, or a dollop of yogurt can be served with upma for a hearty and filling lunch. Upma is best consumed hot.  Variations of Upma Upma’s adaptability is one of its greatest features. Here are some alternatives that you could try: Vegetable Upma To make your upma more colorful and healthful, add several types of vegetables, such as peas, corn, tomatoes, and beans. Tomato Upma Add tomatoes to the seasoning mixture for a zesty variation. Particularly in Tamil Nadu, this variant is well-liked.  Bread Upma Use stale bread cubes rather than semolina. This is a simple variant that takes minutes to prepare. Poha Upma For a lighter take on upma, try using poha, or flattened rice, in place of semolina. Prior to cooking, make sure the poha is drained and rinsed.  Vermicelli Upma For a different texture, use seviyan (vermicelli) instead of semolina. Before using, dry roast the vermicelli. Tips for Making the Perfect Upma Roasting the Semolina: If you want to avoid a sticky texture, always roast the semolina well. Proportions: Semolina to water ratio is important. You need about 2.5 glasses of water for every cup of semolina. Continuous Stirring: Lump-free addition of semolina to hot water requires constant stirring. Flavor Enhancers: You may boost the flavor and color of your upma with a pinch of turmeric powder. Nutty Flavor: Adding some roasted cashews or peanuts to the spice gives your upma a delicious crunch. Health Benefits of Upma In addition to being tasty, Upma Recipe has many health advantages. High in Fiber: Food fiber helps with digestion, and semolina has a lot of it. Low in Fat: Particularly when prepared with little to no ghee or oil, upma is a low-fat dish. Rich in Protein: Including nuts and veggies increases the dish’s protein level.  Good for Diabetics: Semolina’s slow-releasing carbs contribute to steady blood sugar levels. Conclusion Upma is a delicious and adaptable dish that is simple to prepare and can be customized to fit a range of palates. Upma will delight your taste senses and keep you full for hours, whether you like it plain or loaded with nuts and vegetables. Make the ideal upma by following this detailed recipe guide, then savor a hearty and aromatic lunch. Also Read:- The Ultimate Guide to Perfecting Your Homemade Pasta Recipe

Upma Recipe: A Comprehensive Guide to the Perfect Breakfast Delight Read More »

Pasta Recipe

The Ultimate Guide to Perfecting Your Homemade Pasta Recipe

Ultimate Pasta Recipe Pasta is a mainstay of Italian cooking that has become more popular all over the world because of its adaptability, simplicity, and capacity to be elevated to a gourmet level. Pasta Recipe offers several options for sauces, whether you’re partial to a traditional tomato sauce, a rich and creamy Alfredo, or a light and spicy pesto. We will provide a thorough recipe for a delicious pasta dish that will wow your palate and test your culinary prowess in this extensive tutorial. Pasta Recipe Ingredients  For the Pasta: Pasta – 400 grams (spaghetti, penne, or your choice) Salt – 2 tablespoons (for boiling water) Olive Oil – 1 tablespoon For the Tomato Basil Sauce: Olive Oil – 3 tablespoons Garlic – 4 cloves, finely chopped Onion – 1 medium, finely chopped Canned Tomatoes – 800 grams (2 cans, crushed or diced) Tomato Paste – 2 tablespoons Fresh Basil Leaves – 1/2 cup, chopped Salt – to taste Black Pepper – to taste One teaspoon of sugar is optional; it balances the acidity. Red Pepper Flakes – 1/2 teaspoon (optional, for heat) For the Garnish: Parmesan Cheese – 1/2 cup, freshly grated Fresh Basil Leaves – a few sprigs Preparation 1. Cooking the Pasta Boil the Water: Put water in a big saucepan and heat it until it boils vigorously. Boil the water and add two tablespoons of salt. Cook the Pasta: After adding the pasta to the boiling water, cook it as directed on the package until it’s al dente. Usually, this takes eight to ten minutes.  Drain and Drizzle: After the pasta has cooked, drain it and toss with one tablespoon of olive oil to keep it from sticking. Put aside. 2. Preparing the Tomato Basil Sauce Sauté the Aromatics: Three tablespoons of olive oil should be heated over medium heat in a big skillet. Add the onion and garlic, diced fine, and cook until they are transparent and tender. Add the Tomatoes: Stir in tomato paste and diced or crushed canned tomatoes. To let the flavors merge, cook for five to seven minutes. Season: As needed, season with salt, black pepper, and red pepper flakes. Continue to simmer the sauce for ten more minutes, stirring now and again.  Incorporate Fresh Basil: Add the finely chopped fresh basil leaves and taste and adjust the seasoning.  Combining Pasta and Sauce Mix Pasta and Sauce: Cooked pasta should be added to the skillet along with the tomato basil sauce. Make sure the pasta is evenly covered with sauce by giving it a gentle toss. Heat Through: Allow the pasta to soak up the flavors of the sauce by cooking it for two to three minutes on low heat.  4. Serving the Pasta Plate the Pasta: After cooking, transfer the pasta to a big serving bowl or into plates.  Garnish: Add some freshly grated Parmesan cheese on top and some basil leaves as a garnish. Serve: Garlic bread or a crisp green salad should be served alongside the dish right away. Tips for Perfect Pasta Recipe Pasta Choice: To achieve the greatest texture and flavor, choose premium pasta made from durum wheat.  Salt the Water: Pasta tastes better after it has been salted while it is boiling. Al Dente: When combining the pasta recipe with the sauce, cook it until it’s al dente, or firm to the biting. Fresh Ingredients: A bright and tasty sauce can be made with fresh basil and premium canned tomatoes.  Adjust Acidity: Use a tiny bit of sugar to counterbalance the flavors if the tomato sauce is too acidic. Variations of Pasta Dishes Creamy Alfredo Pasta Make a creamy Alfredo sauce with butter, heavy cream, and Parmesan cheese for a decadent and rich pasta dish. After the pasta is cooked, toss it in the sauce and sprinkle with fresh parsley. Pesto Pasta Fresh basil, garlic, pine nuts, Parmesan cheese, and olive oil are blended to make pesto pasta, a light and refreshing substitute. Combine the cooked pasta and pesto, then sprinkle with extra Parmesan and cherry tomatoes.  Aglio e Olio Cooked spaghetti, red pepper flakes, and freshly chopped parsley are combined with garlic that has been sautéed in olive oil to create this easy but tasty pasta dish. Add a final touch of lemon juice and grated Parmesan cheese. Seafood Pasta Add shellfish, such as mussels, prawns, or scallops, to your spaghetti for an opulent twist. Stir in your preferred pasta and a little fresh parsley after sautéing the shellfish with garlic, white wine, and cherry tomatoes. Conclusion Perfect pasta recipes combine basic ingredients and expert cooking methods to create a pleasurable gastronomic journey. Using top-notch, fresh ingredients and paying close attention to detail is crucial, regardless of your preference for a creamy Alfredo or a basic tomato basil sauce. Make a pasta dish that is sure to impress and satisfy by following this comprehensive recipe guide.  Also Read:- Try this pav bhaji recipe to Tasty up your kitchen

The Ultimate Guide to Perfecting Your Homemade Pasta Recipe Read More »

Chicken Cheese Balls

A Party Favorite Chicken Cheese Balls

Chicken Cheese Balls Recipe Delicious chicken and rich, creamy cheese combine to create a delightfully delicious treat that is perfect for any occasion: chicken cheese balls. Chicken cheese balls are a great choice when you’re hosting an event with your loved ones, revelry, or you simply want to enjoy a tasty snack.  Ingredients Materials needed to prepare the perfect chicken cheese balls are as follows:  Chicken: 500 grams of boneless chicken breast, finely minced Cheese: 200 grams of mozzarella cheese, grated Breadcrumbs: 1 cup of breadcrumbs for binding and coating Eggs: 2 large eggs, beaten Onions: 1 medium onion, finely chopped Garlic: 3 cloves of garlic, minced Green Chilies: 2 green chilies, finely chopped (optional, for a spicy kick) Coriander Leaves: A handful of fresh coriander leaves, finely chopped Salt: To taste Mixed black pepper: one teaspoon, just ground Paprika: 1 teaspoon of paprika (optional, for extra flavor) Oil: For deep frying Preparation Steps 1. Preparing the Chicken Mixture First, chop the boneless chicken breast into small pieces. A food processor can be used to get a fine consistency. Minced chicken, finely chopped onions, minced garlic, chopped green chilies, and fresh coriander leaves need to be combined into a large mixing dish. To make sure the herbs and spices are distributed evenly, add the paprika, black pepper, and salt to the mixture and stir well. 2. Incorporating the Cheese Grated mozzarella cheese should be added to the chicken mixture. In addition to adding a rich, creamy texture, the cheese will aid in binding the ingredients together. Make sure the cheese is mixed into the chicken mixture all the way through. 3. Shaping the Balls Roll a tiny bit of the mixture between your palms to make a ball. You can vary the size of the chicken cheese balls to suit your tastes, but a tennis ball’s general length is what they should be. Continue doing this until the entire mixture has been used. 4. Coating the Balls Place bread in one bowl and beaten eggs in another to create a breeding station. Every chicken cheese ball should be dipped into the beaten eggs, letting any extra egg drop out. Next, coat the ball evenly by rolling it in the breadcrumbs. By coating the balls twice, the outside becomes crispy when they are fried. Cooking Methods 1. Deep Frying Cooking chicken cheese balls by deep frying is the most common way to prepare them since it creates a crispy, golden outside with a juicy, tasty within. When the oil is heated, add the chicken cheese balls one at a time, being cautious not to pack the pan too full. Fry for about 5 to 7 minutes, or until they are cooked through and have turned golden brown. After removing the balls from the oil with a slotted spoon, set them on a dish covered with paper towels to absorb any leftover oil. 2. Baking You may bake the chicken cheese balls as a more healthful option. Set the oven temperature to 200°C (392°F). The coated chicken cheese balls should be put on a parchment paper-lined baking pan. If you want them to go crispy, lightly spritz or brush them with oil. To ensure even browning, bake for 20 to 25 minutes, rotating them halfway through.  3. Air Frying Another low-oil and healthful option is air frying. Set your air fryer’s temperature to 180°C (356°F). Make sure the chicken cheese balls in the air fryer basket are not in contact with one another. Cook for 15 to 20 minutes, shaking the basket halfway through to make sure everything cooks evenly. Serving Suggestions Because of their versatility, chicken cheese balls can be served in a variety of ways to fit different settings. 1. As a Snack Serve a range of dipping sauces, like ketchup, mayonnaise, barbecue sauce, or a hot sriracha mayo, alongside chicken cheese balls as a snack. To add even more freshness, garnish with freshly plucked coriander leaves. 2. As an Appetizer For get-togethers and parties, chicken cheese balls are a great appetizer. To facilitate serving, place them on a dish and top with toothpicks. Combine them with a crisp coleslaw or salad for a whole starting plate. 3. In a Sandwich Try stuffing chicken cheese balls onto sliders or sandwiches for a novel take. To make a tasty and filling meal, add lettuce, tomato, and your preferred condiments. Tips for Perfect Chicken Cheese Balls 1. Chill the Mixture Before forming the balls, chill the chicken mixture in the refrigerator for 30 minutes. This helps the mixture solidify and becomes simpler to work with and shape.  2. Consistent Size For optimal cooking, make sure the chicken cheese balls are uniform in size. A tiny ice cream scoop can be used to assist ensure consistency.  3. Don’t Overcrowd the Pan When frying, keep the pan from being too full because this will cause the oil temperature to drop and produce greasy, unevenly cooked balls. Fry in small batches as required.  4. Test Fry One Ball Fry one chicken cheese ball to make sure the spice is just right. Toss to re-season as necessary, then cook the remaining portion. Health Benefits Despite being regarded as decadent, whole chicken cheese balls can be included in a balanced diet if consumed in moderation. The mineral calcium included in mozzarella cheese is essential for healthy bones. One way to save calories and make this delicacy a little healthier is to bake it or air fry it. In summary Delicious and adaptable, chicken cheese balls are a dish that may be enjoyed in a variety of ways. You may become an expert at creating the ideal chicken cheese balls that are juicy on the inside and crispy on the surface by following this thorough instruction. These mouthwatering snacks are sure to be a favorite at any party, whether you want them baked, fried, or air-fried. Also Read:- Seeds Used as Spices

A Party Favorite Chicken Cheese Balls Read More »

Kadai Paneer Recipe

A Tasty and Spicy Kadai Paneer Recipe

A famous restaurant meal and a mainstay in many homes is the delicious North Indian dish known as kadai paneer. The meal gets its name from the Kadai, a wok-like pan used to prepare it in the past. Bell peppers, tomatoes, cheese (Indian cottage cheese), and a mixture of spices are combined to make this flavorful and fiery dish. Make the greatest Kadai Paneer Recipe at home with our detailed instructions; it goes well with rice, roti, or naan.  Ingredients for Kadai Paneer For Kadai Masala Coriander seeds: 2 tablespoons Dry red chilies: 4-5 (adjust to taste) Cumin seeds: 1 teaspoon Black peppercorns: 1 teaspoon Fennel seeds: 1 teaspoon Cloves: 3-4 For Gravy Paneer: 250 grams, cubed Green bell pepper: 1 medium, diced Red bell pepper: 1 medium, diced Onions: 2 medium, finely chopped Tomatoes: 3 large, pureed Garlic: 5-6 cloves, minced Ginger: 1-inch piece, grated Green chilies: 2, slit Kasuri methi (dried fenugreek leaves): 1 tablespoon Cumin seeds: 1 teaspoon Turmeric powder: 1/2 teaspoon Red chili powder: 1 teaspoon Garam masala: 1 teaspoon Salt: to taste Oil: 3 tablespoons Fresh coriander leaves: for garnish Step-by-Step Kadai Paneer Recipe 1. Preparing the Kadai Masala The handmade Kadai masala is essential to getting the real taste of Kadai Paneer. Dry-roast the cloves, black peppercorns, cumin seeds, fennel seeds, and dry red chilies over medium heat until aromatic. Take care not to scorch them. When they are cool, use a mortar and pestle or spice grinder to ground them into a coarse powder. This freshly ground masala gives the food a strong flavor.  2. Cooking the Paneer One tablespoon of oil is heated in a pan. When the paneer cubes are added, gently cook them until they become golden brown. Take out and place aside. This process guarantees that the paneer stays firm but soft and better absorbs the gravy’s tastes. 3. Preparing the Gravy Transfer the leftover oil to the same pan. Sprinkle in the cumin seeds and watch them pop. Onions should then be added and sautéed till golden brown. To bring out the sweetness of the onions, this process should be done slowly. The raw smell should go off after a few minutes of sautéing the minced garlic, grated ginger, and sliced green chilies. 4. Adding the Tomatoes Once the oil separates from the masala, pour in the tomato puree and continue cooking. This is a crucial step since it brings out the flavor and eliminates the raw tomato taste. After adding salt, red chili powder, and turmeric powder, simmer for a further two to three minutes.  5. Combining Ingredients When they are slightly soft but still crunchy, add the diced bell peppers and sauté for a few minutes. Next, thoroughly stir in the prepared Kadai masala to coat the vegetables. To assist combine the spices and prevent sticking, add a splash of water as needed. 6. Final Touches Be careful not to smash the paneer cubes when you add them; stir them gently. Stir the mixture after adding the kasuri methi and garam masala. Allow the paneer to absorb the flavors by simmering it on low heat for a few minutes. If necessary, adjust the taste by adding extra salt or spice. 7. Garnishing and Serving Add freshly cut coriander leaves as a garnish for the Kadai Paneer. Serve hot with steaming rice, roti, or naan. Savor every taste of this delicious dish as it explodes with deliciousness.  Tips for the Perfect Kadai Paneer Recipe Paneer Freshness:Get the greatest results by using soft, fresh paneer. Should you be purchasing paneer from the shop, let it soften for fifteen minutes by soaking it in warm water. Roasting Spices: Make sure the spices are thoroughly roasted without burning them, as this will change the Kadai masala’s overall flavor. Bell Peppers: To give texture to the dish, the bell peppers should have just the right amount of crunch, so be careful not to overcook them. Gravy Consistency: To thin the gravy to your preferred consistency, add a little water. Perfect for Kadai Paneer, a little thick gravy. Kasuri Methi: Fenugreek leaves are more flavorful and aromatic when crushed between your palms before adding.  Nutritional Information Beyond being tasty, Kadai Paneer is also full of nutrients.  Its nutritional advantages are summarized as follows: Protein: Because paneer is an excellent source of protein, eating this meal can help with both muscle growth and repair. Vitamins and Minerals: A good dose of vitamins A and C are added by bell peppers, which improve skin health and the immune system.  Calcium: The high calcium content of paneer is beneficial for healthy bones. Frequently Asked Questions 1. Can I make Kadai Paneer Recipe without onions and garlic? Yes, you can skip onions and garlic if you prefer. Increase the quantity of tomatoes and add a pinch of asafoetida (hing) for a flavorful alternative. 2. How do I make vegan Kadai Paneer? To make a vegan version, substitute paneer with tofu and follow the same recipe. Ensure the tofu is firm and drained well before cooking. 3. Can I prepare Kadai Paneer Recipe in advance? Yes, you can prepare the Kadai masala and the gravy base in advance. Store them separately and combine them with paneer and bell peppers when ready to serve. 4. How do I store leftovers? Remaining food can be kept in the refrigerator for up to two days if it is sealed tightly.  Reheat in a pan or microwave until warm before serving. Conclusion A classic meal that adds a burst of flavors and a rich aroma to your table is Kadai Paneer. This recipe is simple enough to follow and will allow you to have a restaurant-quality meal in your own home. Kadai Paneer’s delicious taste and eye-catching hues will wow your family and visitors whether it’s served for a special event or just casual dining. Also Read :- A Party Favorite Chicken Cheese Balls

A Tasty and Spicy Kadai Paneer Recipe Read More »

Shopping Cart